Jump to:
Lean-to wooden sheds differ from standard four-sided sheds. Fittingly named, they have three walls and rely on an existing building for support on the open side.
Building a lean-to shed is generally simpler and faster than a full four-sided building. The structure it leans against cuts down the need for extra reinforcement. Plus, the sloped roof is easier to install as it connects to an existing wall. That said, you’ll need to make it watertight to avoid leaks and damage.
This guide will take you through the basics of assembling a wooden lean-to shed. There are four steps: planning, building, installing the roof, and sealing. Ready?
Sort Out the Basics First
When tackling DIY projects like shed building, it’s always a good idea to check with your local planning authority first. Confirm the planning permission rules that apply before starting construction.
Many garden structures fall under permitted development and don’t need formal approval. However, certain factors might require it, such as:
- The shed’s size and height
- How close is it to your property boundary or a neighbouring building
- If your home is in a conservation area or is a listed building
- If the shed’s use is anything beyond typical garden storage
Consulting keeps you on the right side of things and helps you avoid any hassle later!
If you’ve been cleared to move forward, the next step is to mark where the shed will lean against and get all the measurements.
The ‘support’ should ideally be a solid, flat wall. Brick or concrete works best, and make sure it’s clear of pipes, windows, or vents. From there, measure the wall’s height and width to match your shed’s size.
Once you’ve decided on the depth, mark the area with chalk or spray paint. If the ground isn’t level, consider adding a gravel base or paving slabs. Remember, the surface has to be flat, too!
Don’t forget to account for drainage by ensuring the roof has a slight slope. The ground should direct water away from both the lean-to shed and the building wall. And that’s it for the planning—time to move on to the next step!
Build the Frame

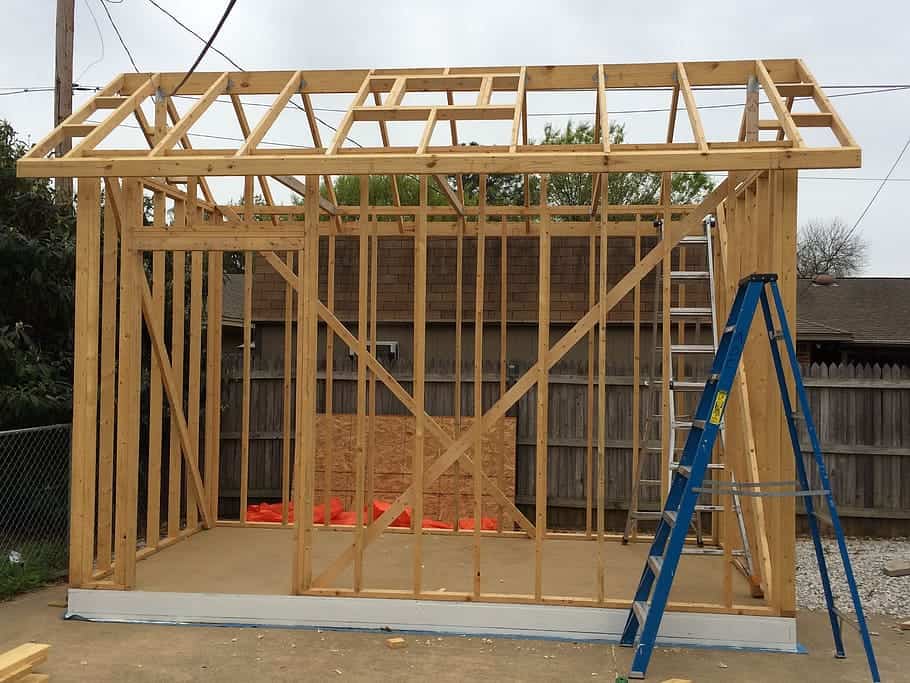
(Image Credit: Wallpaper Flare)
The choice of timber for the frames is up to you, but if you can get treated wood, go for that to protect against rot and decay. If you have the wood, assemble a rectangular base frame and make sure all corners are square. Secure each to the ground with concrete anchors to keep them stable.
Next, build the three wall frames: two shorter sidewalls and one back wall. Measure the height and width of the sidewalls, then cut the timber to size and assemble the frames. The back wall will be the same height as the sidewalls but should match the width of the base frame.
When the wall frames are ready, place them on the base. Use screws or nails to attach the sidewalls and the back wall securely to the base. After that, join the corners of the walls together so everything’s straight and solid.
Install the Roof
Now, it’s time to move on to the roof! Start by cutting the sloped rafters and positioning them. The slope’s key to making sure rainwater runs off properly. Use brackets to fasten the rafters to the building wall and the shed’s sidewalls.
Once the rafters are in place, lay down plywood or something similar to form the base of the roof. Then, cover it with waterproof roofing material like felt shingle tiles or corrugated sheets to protect the shed from the weather.
Seal the Roof-Wall Connection
This is probably the most crucial step when finishing your lean-to shed: making sure the roof is watertight where it meets the wall. It’s where leaks can occur, so you’ll want to get this spot sealed to keep the interior dry.
For this step, grab some flashing tape and apply it along the edge or at the roof-wall junction. This will help stop any water from seeping through. Next, lay down metal flashing on top of the tape. The flashing should be positioned to direct water away from the joint.
Finally, run some waterproof sealant along the edges to fill any small gaps. This will help keep the roof secure and stop any water from getting in. Give it some time to set and cure properly.
Basically, you’re done! Now, feel free to finalise the look of your lean-to shed. This could include adding siding to the walls and painting them with some shed paint ideas. Install the door and windows wherever you think best, and turn your new garden room into a cosy retreat.
If building a wooden lean-to shed seems like too much work, you might find it easier to work with a four-sided metal or plastic alternative. Our selection of prefabricated lean-to sheds are quick to assemble and, while freestanding with four walls, can fit snugly against the wall of your house, garage or other building, or next to your fence.
Up next on your reading list: What Is a Lean-to Shed?
Shop Garden Sheds


